A well-placed garden path does more than connect point A to point B. It shapes how people move through your yard, adds visual structure to your landscape, and gives the whole space a more intentional, polished look. Whether your yard is a sprawling backyard or a modest side strip of grass, a garden path can transform it.
Why Add a Garden Path to Your Yard?
Before picking up a shovel, it’s worth understanding why a garden path is such a worthwhile investment.
Improved functionality. Paths keep foot traffic off your grass and garden beds, reducing soil compaction and protecting your plants. Over time, this actually helps your lawn and garden stay healthier.
Enhanced curb appeal. A clean, well-laid path immediately elevates the visual appeal of your outdoor space. It creates a focal point, guides the eye, and gives your yard a more composed and deliberate feel.
Increased property value. Thoughtful landscaping, including hardscape features like paths, can add meaningful value to your home. It signals to potential buyers that the outdoor space has been cared for.
Safety and accessibility. A path provides a stable, defined surface to walk on—particularly helpful during rain or after watering, when grass and garden beds can get slippery.
Essential Tools and Materials
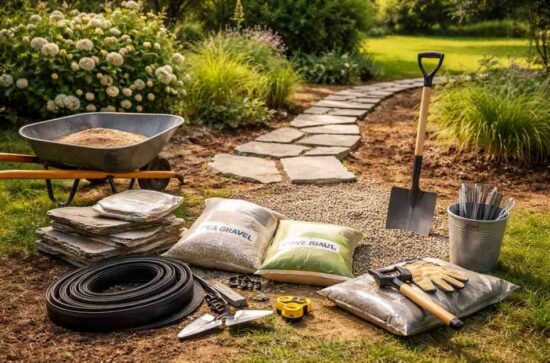
Gathering your tools and materials before you start will save you time and frustration. Here’s what you’ll typically need for a basic home upgrade and garden path:
Tools:
- Shovel or spade
- Garden edger or hand trowel
- Rubber mallet
- Level
- Measuring tape
- String line and stakes
- Wheelbarrow
- Rake and tamper or hand compactor
Materials:
- Path surface material (gravel, stepping stones, flagstone, or pavers)
- Landscape fabric (to suppress weeds)
- Sand or crushed stone base
- Edging material (metal, plastic, or wood)
The materials you choose will largely depend on your budget, your yard’s style, and how much maintenance you’re willing to do. Gravel paths are affordable and easy to install. Flagstone and pavers take a bit more effort but deliver a clean top housing style, lasting result.
Planning and Designing Your Path Layout
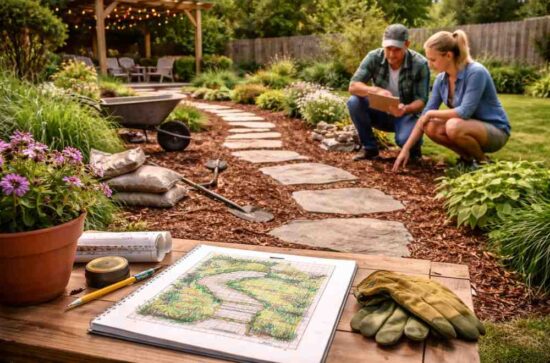
Good planning up front saves a lot of rework later. Start by walking through your yard and identifying the natural routes you already take—between the back door and the shed, around a flower bed, or down to a seating area. Paths that follow these natural lines tend to feel intuitive and look like they belong.
Once you have a general route in mind, use string and stakes to mark it out on the ground. This gives you a visual reference before you commit to digging anything up.
A few design tips worth keeping in mind:
- Width matters. A path that two people can walk side by side on comfortably is usually around 3–4 feet wide. For a single-person path, 18–24 inches is sufficient.
- Curves feel natural. Gently curved paths tend to look more organic and inviting than perfectly straight ones, especially in cottage or naturalistic gardens.
- Think about materials early. If you’re considering bagged landscape rocks in Murray or gravel as your surface material, factor in how many bags you’ll need based on the path length, width, and desired depth (typically 2–3 inches for gravel).
Sketch your design on paper with rough measurements before you start. It doesn’t need to be architectural—just clear enough to guide your work.
Excavation and Ground Preparation
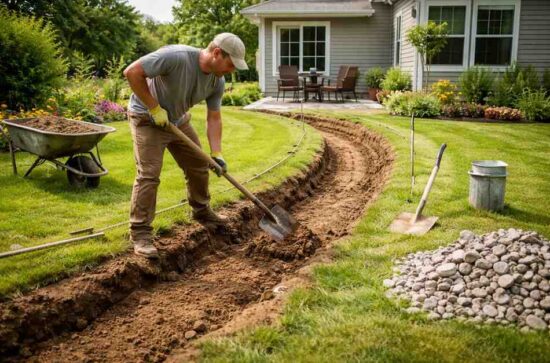
This is the most physically demanding part of the project, but getting it right sets the foundation for everything else.
Step 1: Mark your path boundaries
Using your string lines as a guide, mark the edges of the path clearly with spray paint or a line of sand. This is your digging boundary.
Step 2: Remove the turf and topsoil
Dig out the soil to a depth of about 4–6 inches. This needs to be deep enough to accommodate a base layer of crushed stone or sand plus your surface material. As you dig, keep the sides of your trench as vertical as possible for cleaner edges.
Step 3: Clear the area thoroughly
Remove any roots, rocks, or debris from the excavated area. These can shift and cause unevenness over time if left in place.
Step 4: Compact the soil
Use a tamper or hand compactor to firm up the base of the trench. This prevents settling after installation.
Step 5: Lay landscape fabric
Roll out landscape fabric along the entire length of the path. This suppresses weed growth without preventing water from draining through. Overlap sections by at least 6 inches if you need more than one strip.
Step 6: Add your base layer
Pour in 2–3 inches of crushed stone or coarse sand and rake it level. This layer aids drainage and provides a stable bed for your surface material. Check the level as you go—particularly on sloped ground.
Installation Techniques by Material
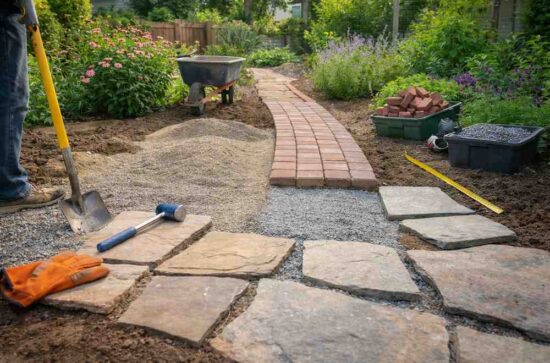
Gravel Paths
Gravel is one of the easiest and most cost-effective options. After your base layer is down, simply pour the gravel in and rake it to an even depth of about 2 inches. Install edging along both sides first to keep the gravel contained. Pea gravel and crushed stone are both popular choices; pea gravel is softer underfoot, while crushed stone compacts more firmly.
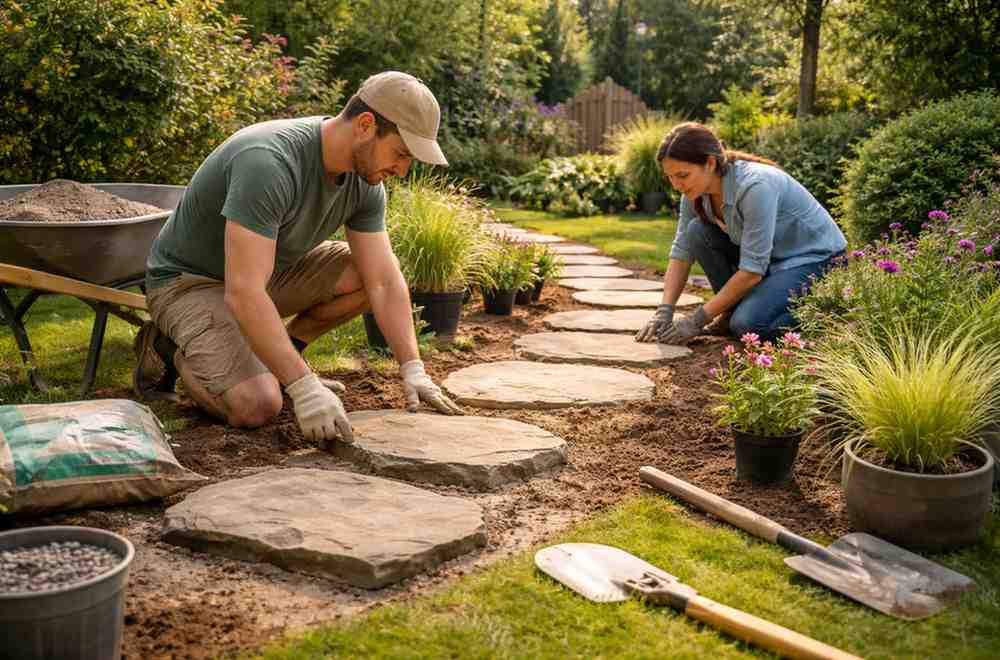
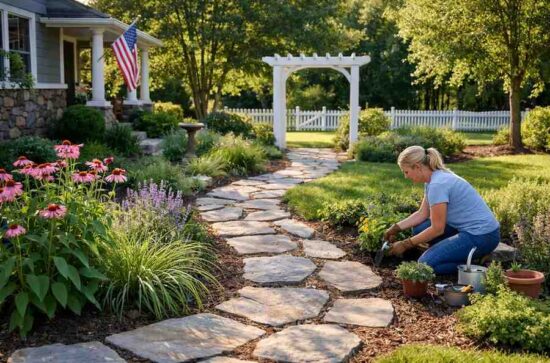
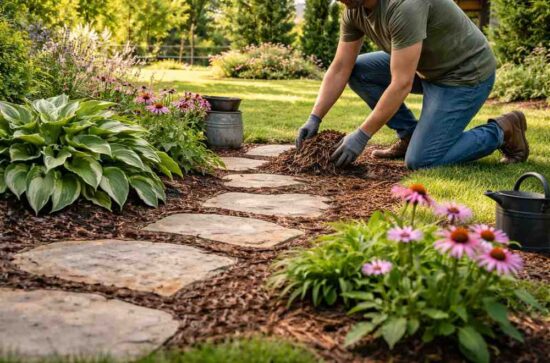
Stepping Stones or Flagstone
Place your stones on top of the leveled base layer, spacing them naturally for a comfortable stride (roughly 18–24 inches from center to center). Press each stone firmly into the base and check it with a level. If a stone rocks, add or remove base material beneath it until it sits flat. Fill the gaps between stones with gravel, sand, or even low-growing ground cover plants like thyme or creeping phlox.
Concrete or Clay Pavers
Pavers require the most precision but deliver a clean, durable result. Lay them in your chosen pattern (running bond and herringbone are both popular) on top of the compacted sand base. Use a rubber mallet to tap each paver into place, and check frequently with a level. Once all pavers are laid, sweep fine sand into the joints and compact the entire surface to lock everything in.
Finishing Touches and Maintenance Tips
Once your path is laid, a few final steps will improve its appearance and longevity.
Install edging (if not already done). Edging along the sides of your path keeps materials in place and creates a crisp border between the path and your garden beds or lawn. Metal and plastic edging are both durable options; timber can work too, but will eventually degrade.
Top-dress as needed. For gravel paths, plan to top up the surface material every year or two as it disperses or settles.
Weed management. Even with landscape fabric, some weeds will find a way through joints and edges. Spot-treat with a weeding tool or apply a natural weed suppressant to keep them in check.
Check for shifting or settling. After heavy rain or frost, inspect your path for any stones or pavers that have shifted. Re-leveling individual pieces early prevents larger problems down the track.
Keep it clean. Sweep away leaves and debris regularly to prevent organic matter from building up and encouraging moss or weed growth—especially in shaded areas.
Conclusion
Building a garden path is one of those projects where the effort involved is moderate, but the impact on your yard is significant. A path that’s thoughtfully designed and properly installed can last for decades with minimal upkeep—and it makes every trip through your garden feel a little more special.