A backyard renovation can feel exciting right up until you’re standing outside with a coffee in hand, realizing you have no idea where to begin. Do you rip out the old patio first? Call a contractor? Pick out plants? The options multiply fast, and without a clear plan, even a modest project can spiral into delays and budget blowouts.
Step 1: Assess What You’re Working With
Before sketching any designs or browsing materials, spend time observing your current backyard. Walk around at different times of day to note where the sun hits, where water pools after rain, and which areas feel awkward or underused.
Ask yourself a few key questions:
- What do you primarily want from this space? Entertaining, gardening, play, relaxation—or a mix?
- What existing features are worth keeping, such as mature trees, a solid fence line, or a usable patio?
- What are the biggest pain points right now? Poor drainage, lack of shade, and an unusable lawn?
Mapping this out—even with a rough hand-drawn sketch—helps you prioritize and gives any contractor or designer a useful starting point. It also prevents the common mistake of renovating before you fully understand how you use the space.
Step 2: Set a Realistic Budget
Backyard renovations vary enormously in cost. A simple lawn refresh might cost a few hundred dollars; a full landscaping overhaul with hardscaping, outdoor lighting, and a deck can run into the tens of thousands. Knowing your number before you get attached to ideas saves a lot of heartache later.
When building your budget, account for:
- Materials: Paving, timber, soil, plants, mulch, fencing
- Labor: Landscapers, builders, electricians (for outdoor lighting or power)
- Permits and fees: Some projects require council or HOA approval
- Contingency fund: Set aside 10–15% for unexpected costs—soil issues, hidden drainage problems, or price changes mid-project are all common
It’s also worth deciding early on which elements are non-negotiable and which are “nice to have.” That way, if costs creep up, you know exactly what to cut without compromising the core vision.
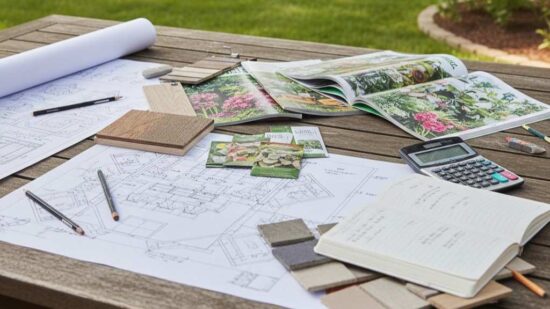
Step 3: Gather Inspiration and Check the Rules
Once you have a rough budget, let yourself explore ideas. Online platforms and landscape design magazines are all great sources. Save images that appeal to you—even if you can’t pinpoint why—and look for patterns. Are you drawn to clean lines and minimal planting? Lush, layered gardens? Rustic timber and stone?
Creating a simple mood board (digital or physical) helps you communicate your vision to contractors and keeps decision-making consistent as the project progresses.
At the same time, do your homework on local regulations. Depending on where you live, certain projects may require planning permission or need to comply with HOA guidelines. Common restrictions include:
- Fence materials and height
- Impervious surface coverage (how much of your yard can be paved or covered)
- Setback requirements for structures like sheds or pergolas
- Tree removal restrictions
Skipping this step can result in costly do-overs, so it’s worth a quick call to your local council or a review of your HOA rulebook before committing to a design.
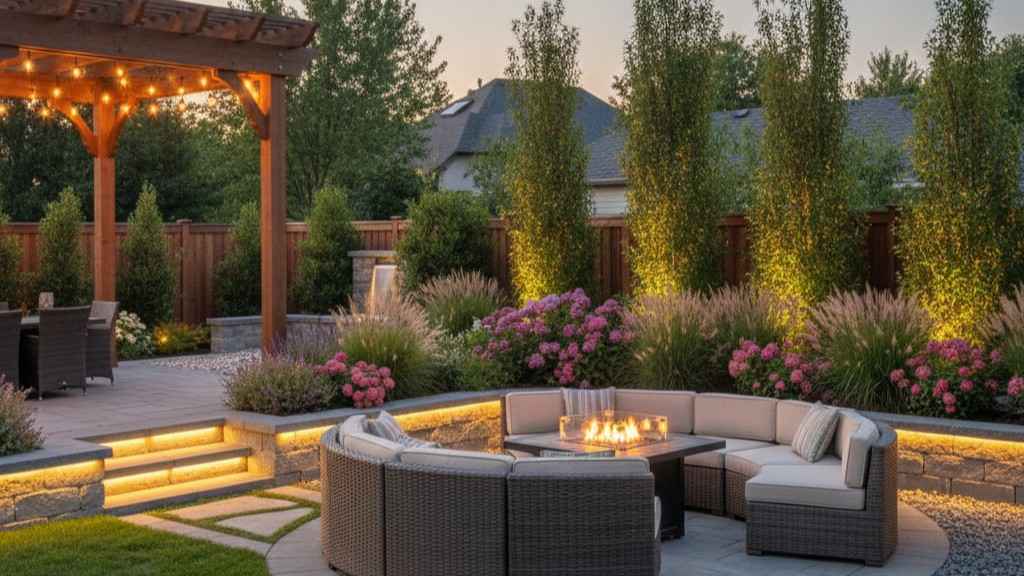
Step 4: Choose Your Design Style and Decide on DIY vs. Hiring Out
With inspiration gathered and constraints understood, it’s time to settle on a design direction. Your style should complement your home’s architecture while suiting how you plan to use the space. A contemporary home often pairs well with clean geometric lines and restrained planting; a heritage cottage might suit a more relaxed, cottage-garden approach.
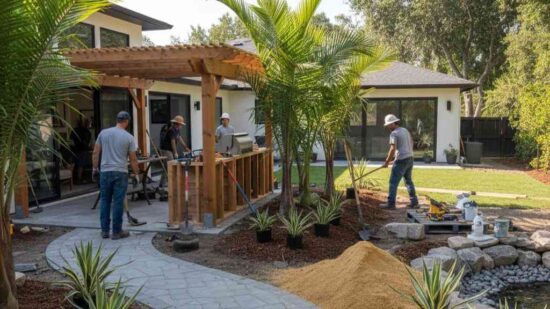
Once you have a direction, be honest about what you can realistically tackle yourself and what needs a professional. DIY works well for tasks like painting fences, laying mulch, building raised garden beds, or installing simple lighting. For structural work—pergolas, retaining walls, drainage solutions, or complex paving—professional help is usually worth the investment.
If your plans include new or replacement fencing, bringing in a reputable fence company in Salt Lake City early is a smart move. Fencing often defines the boundaries of other design decisions and can take several weeks to schedule and install.
For larger renovations, consider hiring a landscape designer to draw up a plan. Even a single consultation can sharpen your ideas, highlight potential issues, and give you a document to work from when getting contractor quotes.
Step 5: Choose Materials and Plants Suited to Your Climate
One of the most common backyard renovation regrets is choosing materials or plants that look great in photos but don’t hold up locally. A tropical garden is stunning—unless you live somewhere with harsh winters. Pale limestone paving looks elegant—until you realize it stains easily and becomes slippery when wet.
For hardscaping materials, think about:
- Durability: Can it handle your local freeze-thaw cycles, heat, or humidity?
- Maintenance: How much upkeep does it need over time?
- Safety: Is it slip-resistant in wet conditions?
- Aesthetics: Does it complement your home and overall design?
For planting, visit a local nursery rather than ordering online when possible. Staff can advise on what thrives in your soil type and climate zone. Native and climate-adapted plants are generally hardier, require less water once established, and support local wildlife.
If water efficiency matters to you, consider grouping plants with similar watering needs together and incorporating mulch to retain moisture. These small decisions reduce ongoing maintenance and water bills significantly.
Step 6: Build a Phased Timeline
Trying to complete a full backyard renovation all at once is rarely practical—or necessary. Breaking the project into phases makes it more manageable, easier to budget, and less disruptive to daily life.
A logical construction sequence typically looks like this:
- Demolition and site prep: Remove unwanted structures, old paving, or overgrown plants
- Earthworks and drainage: Address grading, drainage, and soil preparation
- Hard landscaping: Install fences, retaining walls, paving, and structures like pergolas or decks
- Services: Lay irrigation lines, outdoor lighting conduits, and any electrical work
- Soft landscaping: Planting, lawn installation, mulching
- Finishing touches: Outdoor furniture, lighting fixtures, decorative elements
Getting trades on-site in the right order prevents expensive rework. Hardscaping before planting, for instance, avoids damage to new garden beds from heavy equipment.
Build buffer time between stages wherever possible. Contractors get delayed, materials get back-ordered, and the weather doesn’t always cooperate. A flexible timeline reduces stress and keeps the backyard renovation project moving forward without rushed decisions.
Conclusion
A backyard renovation adds livable space, boosts property value, and transforms daily life. To succeed, plan carefully: assess your space, set a budget, research options, and check local regulations. Lock in a design, choose climate-friendly materials and plants, and follow a phased timeline. Preparation is key to a rewarding project!